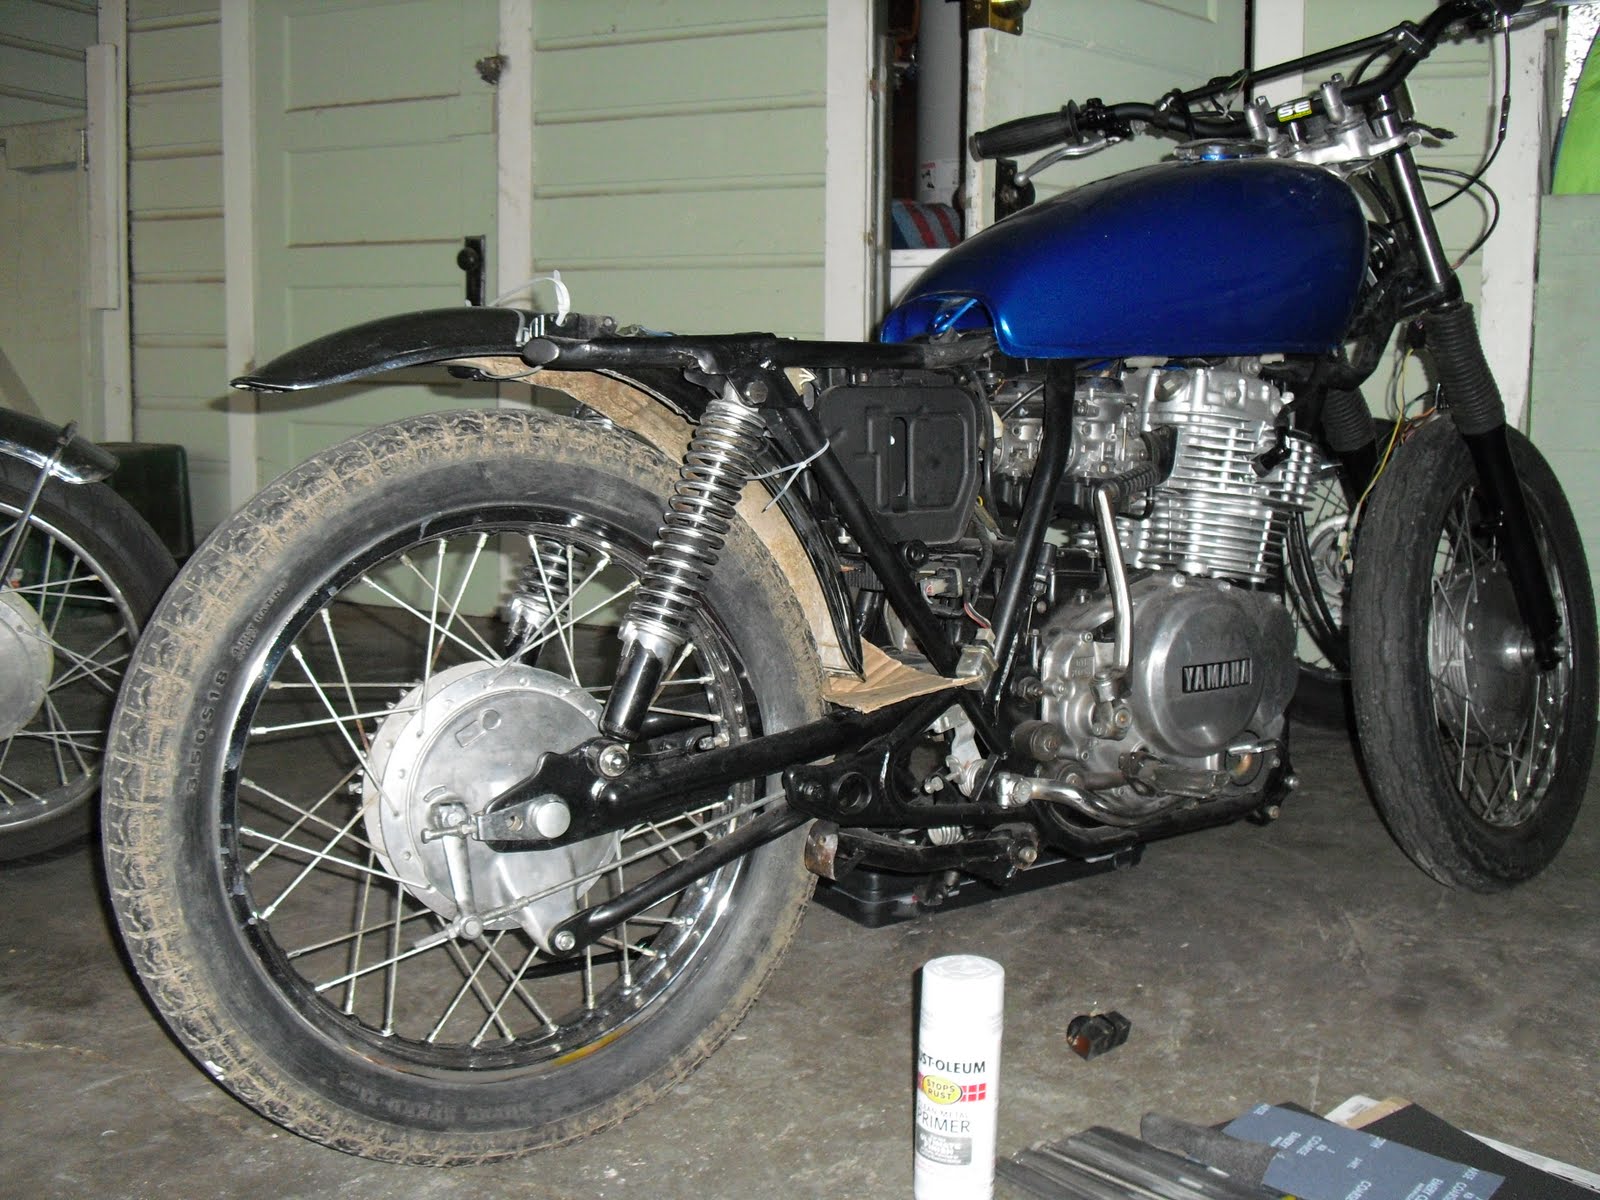
Well, here's another one for the stable. Even without the tank, the bike screams early 80s. It's an odd little bike, belt drive with a stock 19 inch front wheel to start. It's going to take some imagination and loads of work, but this will someday be a fine cafe bike. Don't believe me? I'm not sure that I do either, but lets stay positive. It's not all bad though...The bike runs strong with good compression and all the electrics work. That makes cosmetics top priority...thank goodness.....
You can follow this build in greater detail at: http://ornatecode.com/kz440/
Showing posts with label project bike. Show all posts
Monday, September 19, 2011
Sunday, September 11, 2011
Project xs400 - Cafe Racer
My xs400.
fork brace
tapered roller bearings
20 w 50 oil in fork
gas rear shocks
2 into 1 exhaust
adjustable clip-ons
dual front disk
Magura brake lever and master cylinder
upgraded headlight
fiberglass seat
battery relocation
K&N air filters
custom gauge mount
79' motor w/cdi
rear sets
FOR SALE.
fork brace
tapered roller bearings
20 w 50 oil in fork
gas rear shocks
2 into 1 exhaust
adjustable clip-ons
dual front disk
Magura brake lever and master cylinder
upgraded headlight
fiberglass seat
battery relocation
K&N air filters
custom gauge mount
79' motor w/cdi
rear sets
FOR SALE.
Wednesday, August 17, 2011
Project xs400 - Cafe Racer
This is my xs400 cafe. A little inspiration supplied by me. I'm honestly almost done, honestly. Although I have made some changes since I took these crappy pictures with my phone. I know they say that you're never really done with these kinds of things and with vintage bikes thats often true, but I've decided to forgo the front suspension swap and move on to my new project. I'll let that one loose soon. Sketches will be the next thing that I post on the new bike.
I'll take some better photos in a few weeks.


Tuesday, March 22, 2011
Project CB160 - Wheels and Tires
Cleaning your vintage wheels the right way includes most, if not all of what you are about to read. This includes taking apart the wheel completely separating the rim, spokes and hub. Start out by glass bead blasting the inside and center surfaces of the hub to clean them up. You could blast the outside also to remove the factory clear coat, but that could get costly. Instead, wet sand the really rough areas with fine grit emery cloth or if it's not that bad, polish using the aggressive ebony compound. Then move on to the brown tripoly compound with a tight spiral sewn buffing wheel. The next step is to use a white(fine) polishing compound with a loose cloth buffing wheel. Finally, clean and even the finish by hand polishing with some Mother's aluminum polish.
After the spokes and rim have been thoroughly cleaned, start to lace the wheel. On your vintage wheel, in most cases, you will see some slight wear marks from where the spokes were originally. this will help you place the outside spokes where they were prior to cleaning. String all of the outside spokes, then all of the inside spokes on one side of the hub first. Place the rim over the top and begin to thread a few of the nipples through the rim onto the spokes. Flip over the wheel and do the same to the other side. You will have to loosen and tighten spokes in order to get all of the spokes strung evenly. After all of the nipples are threaded hand tight, try to evenly tighten the spokes with a wrench. Test the spokes by tapping them with a wrench as they all should produce about the same tone if they are under the same tension. This part takes a while. After you've finished up, bring it to a local shop for truing and a once over.
The tires that will be mounted on the rims are some Michelin Gazelle M62's. 18" x 2.75" front and rear will cost you about $24 a piece.
Typical oxidized finish followed by Atypical mirror finish:

After the spokes and rim have been thoroughly cleaned, start to lace the wheel. On your vintage wheel, in most cases, you will see some slight wear marks from where the spokes were originally. this will help you place the outside spokes where they were prior to cleaning. String all of the outside spokes, then all of the inside spokes on one side of the hub first. Place the rim over the top and begin to thread a few of the nipples through the rim onto the spokes. Flip over the wheel and do the same to the other side. You will have to loosen and tighten spokes in order to get all of the spokes strung evenly. After all of the nipples are threaded hand tight, try to evenly tighten the spokes with a wrench. Test the spokes by tapping them with a wrench as they all should produce about the same tone if they are under the same tension. This part takes a while. After you've finished up, bring it to a local shop for truing and a once over.
The tires that will be mounted on the rims are some Michelin Gazelle M62's. 18" x 2.75" front and rear will cost you about $24 a piece.
Typical oxidized finish followed by Atypical mirror finish:

Sunday, March 6, 2011
Project Blue Basketcase - xs400 Meet Your Maker
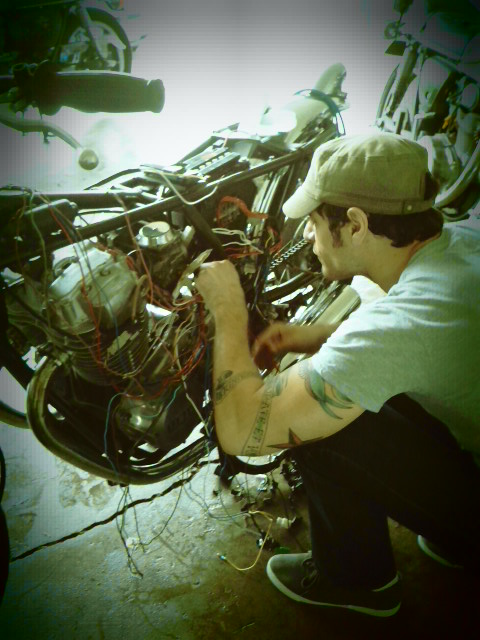
Just some self aggrandising pictures of me working on the 400. I was able to get the electrical sorted out, eliminating all the unnecessary bits. The seat, including the frame and upholstery is next on the list. I'll be taking measurements tomorrow and with any luck, I'll have the seat pan set by the end of the week. Oil, gas and kicking on Wednesday. It wont be long now....
Plus, i put the wiring diagram I used on the bottom. It should work for the CDI model xs400s regardless of version. Trust me, you'll need it eventually.


Thursday, March 3, 2011
Project Blue Basketcase - xs400 - Update 3
Header wrap is good for a lot of things. Specifically, to cover up shitty looking pipes that might have been butchered by the previous owner of your project bike. I wrapped the headers that came with the 400 in a titanium colored exhaust wrap. The whole process was pretty much painless and thankfully allowed the current exhaust to be salvaged. I literally get an instant head ache when I try to figure out what the guys that had the bike last were thinking. Good news is, it's basically ready to be gassed up and kicked over...fingers crossed everybody. I have all necessary electrics working and the mess of wires is ready to be wrapped. Also, I got back the rear wheel with the new tire mounted to it. I went with a OEM looking Duro(cheap) and went slightly over sized. Plenty of room to accommodate the 400/18 rear tire.
Anyways, if you decide to wrap the headers on your bike make sure to soak the wrap in water before you start applying the tape to the header. Start wraping the header from rear of the pipe to the front. That way, it protects itself all the way down the header. Also, try to make it tight as you evenly wrap it. That way, when the wrap drys, it will tighten even more and last you longer.


Anyways, if you decide to wrap the headers on your bike make sure to soak the wrap in water before you start applying the tape to the header. Start wraping the header from rear of the pipe to the front. That way, it protects itself all the way down the header. Also, try to make it tight as you evenly wrap it. That way, when the wrap drys, it will tighten even more and last you longer.
Sunday, February 20, 2011
Project Blue Basketcase - xs400 - Update 2
Steady as she goes....
I've mounted the rear fender along with the tail light and they feel really solid. I threw on a pair of omni pod filters(54mm fits perfect) so I'm hoping it wont need to be heavily rejetted. I'm not sure how they perform, but they're much cheaper than the K&N's I have on my other xs400 project. The rear tire is on order and should arrive next week. I ordered it through Bill Kasson's Yamaha, who will be mounting the tire as well. Bill really knows his Yamaha's and I mean ALL of them. Seriously, I know a lot myself and he taught me a thing or two. On top of that, Bill agreed to donate some goodies to the East Side Classic Rally I'm putting together for June.
I'm currently tracing and removing all unnecessary wiring which is turning out to be a bit of a headache. I'm sure it wouldn't have been this bad if I had been a little more selective about which basketcase case to get involved in. Sounds like most of my relationships...
The electrics are my current priority and hopefully wont be for much longer, as I HATE doing electrics. Although, there is something nice about having less clutter around the bike and having less to hide.
Progress...


I've mounted the rear fender along with the tail light and they feel really solid. I threw on a pair of omni pod filters(54mm fits perfect) so I'm hoping it wont need to be heavily rejetted. I'm not sure how they perform, but they're much cheaper than the K&N's I have on my other xs400 project. The rear tire is on order and should arrive next week. I ordered it through Bill Kasson's Yamaha, who will be mounting the tire as well. Bill really knows his Yamaha's and I mean ALL of them. Seriously, I know a lot myself and he taught me a thing or two. On top of that, Bill agreed to donate some goodies to the East Side Classic Rally I'm putting together for June.
I'm currently tracing and removing all unnecessary wiring which is turning out to be a bit of a headache. I'm sure it wouldn't have been this bad if I had been a little more selective about which basketcase case to get involved in. Sounds like most of my relationships...
The electrics are my current priority and hopefully wont be for much longer, as I HATE doing electrics. Although, there is something nice about having less clutter around the bike and having less to hide.
Progress...


Tuesday, February 15, 2011
project cb160 - Disassembly
Disassembly. The easy part. For those that haven't done this on a bike yet, do yourself a favor and make a few small investments. The necessity of these items is totally dependant on the complexity of your bike project, but even with the 60's Honda's it's not a bad idea to pick up a few of these items. The short list includes:
-masking or painters tape
-brush on white out
-quart and gallon sized zip loc bags
-digital camera(take more pictures than you could possibly need)
-a few large size cardboard or Rubbermaid bins
-sharpie markers(preferably multiple colors)
These items will allow you to catalog and organise all those easily losable parts that make up your bike. The last thing you want to have to do is spend your project budget on non performance parts that already own...someplace...
The 160 is getting the complete ground up restoration, as in frame off, parts will be everywhere so organisation is key. The frame will be sand blasted at the a local do-it-yourself blasting shop and then dropped off for powder coating. I've always been impressed with Honda's use of the engine as an integral point of frame support, especially back in the 60's.
Further progress on the frame off restoration:

-masking or painters tape
-brush on white out
-quart and gallon sized zip loc bags
-digital camera(take more pictures than you could possibly need)
-a few large size cardboard or Rubbermaid bins
-sharpie markers(preferably multiple colors)
These items will allow you to catalog and organise all those easily losable parts that make up your bike. The last thing you want to have to do is spend your project budget on non performance parts that already own...someplace...
The 160 is getting the complete ground up restoration, as in frame off, parts will be everywhere so organisation is key. The frame will be sand blasted at the a local do-it-yourself blasting shop and then dropped off for powder coating. I've always been impressed with Honda's use of the engine as an integral point of frame support, especially back in the 60's.
Further progress on the frame off restoration:
Monday, January 31, 2011
Project Blue Basketcase - xs400 - Update 1
Well, it's a little less embarrassing now, so that's good. I took everything off the front end and attached the mini gauges I picked up for the other xs400. I think it looks better already. The forks are rubbish and will have to be rebuilt also. So much for my budget. I ground down the original seat mounts on the front end and modified the rear mount points for the seat and fender. I ordered an 18 inch rear wheel from a 79' xs400 off of ebay for $50 shipped as the 16 inch stock rear looked ridiculous. I removed the upper shock covers on the rear shocks also. To do so, simply use and angle grinder to cut a slit down two sides across from each other, bend up and twist. Then pull the thin metal to one side and cut to the center.
Along with that, I've started to mount the rear fender, which is actually a front fender off of a xs650 special I got from Chris at Limey Bikes here in austin. If you're looking for parts or expertise on yamaha xs's he's the man to see. I'll be mounting a taillight on the end of the fender and building a seat pan shortly after.
Wednesday, January 19, 2011
Project Blue Basketcase - xs400
I realize i should probably have waited to start a new xs400 project till I finish the other xs400 cafe project, but i couldn't resist. Oh, does this ever confirm that i have a problem. Anyone of sound mind would've left this mess alone, but I see a cool bike in there someplace. This will be an xs inspired by the work of some of the japanese shops I recently posted about. First order of business, get rid of that 16 inch wheel in the back...and sort out the electrics....and get rid of those awful clubmans...and ridiculous seat...and that massive speedo...and, and, and...you get the idea.


Thursday, December 23, 2010
Project CB750, Almost...
Well, here's a Honda 750 project that I would've loved to outline the progress of on Looks Fast, but i guess i missed out. The builder's been cooped up in his garage for the last few months so I havent had a chance to meet him till a couple weeks ago. He's a pretty smart cat and does nothing to do with bike building for a living. He did an excellent, sort of Carpy styled 750 for his first build. Really though, what I like best about him isn't his girlfriend, as the song goes, but his AWESOME garage/living space! I don't know how he found it, but I'm kicking myself for not even thinking to look for a place like this of my own. Basically, it's a full two car garage that he's lives above. Perfect. Bastard.
Back to the bike. The bike is nearly complete, but he's still trying to figure out a good comfortable handlebar set up and he's waiting for the tank to come in the mail. The tank was from Roc City Cafe, but to fit the 72' 750, a relief had to be made in the bottom of the tank on the right side for the carburetor. Aaron(the 750 owner) didn't test fit the tank while the carburetors were on so the tank was sent back, to Roc City fully painted. The Roc City guys were great about it and modified the tank for nothing. I don't you about the dealings that everybody else has had with parts resellers, but they are rarely that committed to standing behind their products. I'm definitely going to keep these guys in mind for my next project.
Roc City also has a really informative blog, which can be seen here:
http://roccitycafe.blogspot.com/
I'll spend a bit more time on the bike outlining whats on it, in it and how it rides at a later date. He did take it out for a ride with a 74' 750 tank thrown on and it sounded great. Here's some pictures of it without the new tank and our ride to the Dog and Duck pub in Austin.


Picked up a Guzzy on the way there...
Back to the bike. The bike is nearly complete, but he's still trying to figure out a good comfortable handlebar set up and he's waiting for the tank to come in the mail. The tank was from Roc City Cafe, but to fit the 72' 750, a relief had to be made in the bottom of the tank on the right side for the carburetor. Aaron(the 750 owner) didn't test fit the tank while the carburetors were on so the tank was sent back, to Roc City fully painted. The Roc City guys were great about it and modified the tank for nothing. I don't you about the dealings that everybody else has had with parts resellers, but they are rarely that committed to standing behind their products. I'm definitely going to keep these guys in mind for my next project.
Roc City also has a really informative blog, which can be seen here:
http://roccitycafe.blogspot.com/
I'll spend a bit more time on the bike outlining whats on it, in it and how it rides at a later date. He did take it out for a ride with a 74' 750 tank thrown on and it sounded great. Here's some pictures of it without the new tank and our ride to the Dog and Duck pub in Austin.
Picked up a Guzzy on the way there...
Subscribe to:
Posts (Atom)